
8 min read
Disclosure: As an Amazon Associate and eBay Partner Network publisher, we earn from qualifying purchases. This doesn’t affect what we recommend or how we describe it.
CO2 drop checkers are essential for three types of home aquarists: those setting up their first planted tank and wanting to avoid algae disasters, experienced hobbyists dialing in lush aquascapes, and anyone troubleshooting inconsistent plant growth. Each group needs clear, actionable instructions to install and read a drop checker correctly—because even minor mistakes can lead to wasted CO2, stunted plants, or fish stress. This guide cuts through the confusion with practical advice, real numbers, and setup steps for reliable results.
Choosing the Right Drop Checker for Your Aquarium
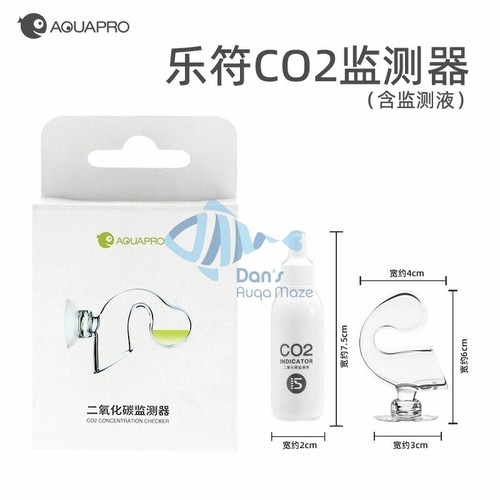
Drop checkers come in several forms, but the differences matter when it comes to accuracy, ease of use, and fit for your tank size. The main decision points are the shape, size, and material of the checker, as well as how easy it is to refill and position in your aquarium. Here’s what matters most for planted tanks from 10 to 75 gallons.
- Volume compatibility: For nano tanks (under 20 gallons), a small drop checker (2–3 cm diameter) minimizes visual intrusion and keeps reagent volume proportional to tank size. Larger tanks benefit from bigger checkers (4–5 cm), which are easier to read from across the room.
- Material: Glass is most common for clarity and aesthetics, but acrylic options resist breakage if you have rambunctious fish or children.
- Reagent chamber size: Look for a chamber that holds 2–3 mL of indicator solution. Oversized chambers slow response time, while tiny ones dry out quickly.
For most home tanks, a glass drop checker with a 2–3 mL chamber and a clear suction cup is the sweet spot. Avoid oversized units unless you have a massive display or poor eyesight—bigger isn’t better for response time.
Drop Checker Types and Feature Comparison
| Type | Material | Chamber Volume | Ease of Refilling | Visibility |
|---|---|---|---|---|
| Classic Glass U-shape | Glass | 2–3 mL | Moderate | High (crystal clear) |
| Mini Nano Checker | Glass | 1–1.5 mL | Tricky (small opening) | Low–moderate |
| Acrylic Dome | Acrylic | 2–3 mL | Easy | Moderate |
| Large Bulb Checker | Glass | 4–5 mL | Easy | Very high |
| Integrated Indicator Kit | Plastic | 2 mL | Very easy (snap cap) | Moderate |
For most hobbyists, the classic glass U-shape offers the best balance between accuracy, visibility, and cost. Nano checkers suit pico tanks but can be fiddly to refill. Acrylic domes are durable for high-traffic tanks. Compare options for your specific tank size and budget.
What Solution Goes Inside? Getting the Indicator Right
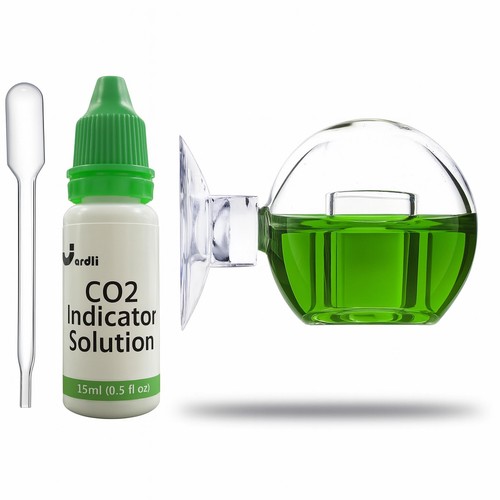
The drop checker only works if you use a proper indicator solution—usually a 4 dKH (degrees carbonate hardness) reference solution mixed with bromothymol blue. This mixture changes color based on the CO2 concentration in your tank’s water, giving you a reliable visual signal.
- 4 dKH solution: This is critical. Using straight tank water or tap water will give false readings because the carbonate hardness isn’t controlled. Buy a premixed 4 dKH solution or prepare it with precise measurement—never guess.
- Indicator dye: Bromothymol blue is the standard. Add 2–3 drops per 2 mL of 4 dKH solution in your checker.
With the right mix, the drop checker will turn blue (low CO2, under 15 ppm), green (ideal CO2, 20–30 ppm), or yellow (too much CO2, over 35 ppm). The color change is most accurate when viewed against a white background.
How to Set Up a CO2 Drop Checker: Step-by-Step Guide
- Prepare the indicator solution. Mix 2–3 mL of 4 dKH reference solution with 2–3 drops of bromothymol blue in a clean container. Swirl gently to ensure even color.
- Fill the drop checker chamber. Use a pipette or syringe to carefully add the prepared solution to the drop checker’s bulb, filling it about halfway. Avoid overfilling, which can cause leaks.
- Secure the drop checker in the tank. Attach the drop checker to the aquarium glass using the suction cup. Place it on the opposite side from the CO2 diffuser, about halfway down the tank height, to sample average water conditions.
- Wait for the first reading. Allow 1–2 hours for the solution to equilibrate with the tank’s CO2 levels. The color will gradually shift from blue to green or yellow depending on your CO2 concentration.
- Check color against a reference. Compare the drop checker’s color to a printed or digital CO2 color chart viewed in natural light. Adjust your CO2 system as needed to maintain a green color (20–30 ppm CO2).
- Rinse and refill every 2 weeks. Refresh the solution at least every 14 days, or sooner if it becomes cloudy or evaporates. Always use fresh 4 dKH and indicator for reliable readings.
Following these steps avoids the most common setup mistakes: using tank water, placing the checker too close to the diffuser, or skipping regular refills. See today’s deals on refill kits and indicator solutions to keep your readings accurate.
Placement and Maintenance Details That Matter
Where you put your drop checker affects both its accuracy and how easy it is to read. Avoid placing it near the CO2 diffuser, filter outflow, or airstone—these spots can give you artificially high or fluctuating readings. Instead, aim for a location with stable, mixed water movement. About halfway up the glass on the opposite end from your diffuser is ideal for tanks 20 gallons and up. In nano tanks, just avoid direct CO2 bubbles or filter flow.
Clean your drop checker with a soft brush and warm water every refill. Never use soap or chemical cleaners, as residues can interfere with the color change. For hard water stains, a quick soak in diluted white vinegar (then thorough rinsing) keeps glass checkers crystal clear.
Related Guides
- How to Set Up a CO2 Drop Checker: A Step-by-Step Guide
- CO2 Drop Checkers for Aquariums: What to Know Before You Buy
- What Do Check Valves Do in Aquariums? Understanding Their Function
- Manual vs Digital pH Meters: What’s the Real Difference?
- Our guide to How to Repair an Aquarium Heater: A Step-by-Step Guide
- Our guide to How to Calibrate pH Probes: A Step-by-Step Guide for Aquarium Owners
Total cost of ownership
Setting up a drop checker is affordable, but ongoing costs add up if you want reliable results:
- Indicator solution refills: Expect to use 10–20 mL of 4 dKH solution and indicator dye every month for a single drop checker, which adds up to 120–240 mL per year (roughly 2–4 bottles annually).
- Replacement drop checker (breakage): Glass checkers can break if dropped during cleaning. Plan for a replacement every 2–3 years for typical home use.
- Suction cup replacements: These harden or lose grip after 6–12 months, especially in warm tanks. Budget for 1–2 new suction cups per year.
- Cleaning supplies: Soft brushes or specialty cleaning swabs last for years, but vinegar for descaling may be needed monthly if you have hard water.
Overall, expect to spend a modest amount annually on consumables—often less than a single new plant or CO2 refill. Factoring in these costs helps avoid surprises and keeps your tank running smoothly. Check current prices on bulk indicator refills and accessories.
FAQ: CO2 Drop Checker Setup and Troubleshooting
How long does the indicator solution last before needing replacement?
In most home aquariums, the indicator solution should be replaced every 2 weeks. Evaporation, algae growth, or chemical breakdown can make the solution unreliable after 14 days. If you notice cloudiness or a faded color, change it sooner for accurate readings.
Can I use tank water instead of 4 dKH solution?
No, using tank water will give inaccurate CO2 readings because the carbonate hardness is not controlled. Always use a 4 dKH reference solution, which ensures the color change accurately reflects CO2 concentration in your tank.
Glass vs acrylic drop checkers — which is better for beginners?
Glass drop checkers provide clearer visibility and a more precise color change, making them ideal for most setups. Acrylic options are less fragile and better suited for tanks with active fish or where accidental bumps are likely. Beginners often prefer glass for the ease of color reading.
How do I know if the drop checker is working correctly?
The solution should change color within 1–2 hours of setup, moving from blue to green or yellow depending on CO2 levels. If the color never changes, check for air leaks, expired indicator solution, or incorrect placement. A properly working checker responds to CO2 adjustments in your tank within a couple of hours.
What should I do if my drop checker falls off or breaks?
Remove any broken glass or spilled solution from the tank immediately to prevent harm to fish or plants. Replace the drop checker with a new one and use a fresh suction cup. Most reputable sellers offer replacement suction cups or drop checker bulbs separately.
Are drop checkers compatible with all aquarium sizes?
Yes, but choose the size based on your tank’s volume. Nano drop checkers are best for tanks under 15 gallons, while standard and large models suit tanks up to 75 gallons. Oversized drop checkers can look bulky in small tanks and may respond more slowly in very large systems.
Is there a warranty or return policy for drop checkers?
Most drop checkers come with a limited warranty against manufacturing defects, but glass breakage is rarely covered. Check seller policies for returns, especially if you receive a damaged unit. Keeping the packaging for a few weeks makes returns easier if needed.
Further Reading and Trusted References
For a deeper dive into CO2 management in planted aquariums, see the comprehensive guides at UK Aquatic Plant Society. Their forums and articles provide peer-reviewed advice on CO2 equipment and troubleshooting.
For technical background on water chemistry and CO2 solubility, the Aquatic Plant Society offers detailed resources for hobbyists and professionals alike.


Last updated: June 2026 · How we put guides together