8 min read
Disclosure: As an Amazon Associate and eBay Partner Network publisher, we earn from qualifying purchases. This doesn’t affect what we recommend or how we describe it.
Most aquarium lighting guides gloss over bulb changes as a quick, one-size-fits-all task. In reality, the right approach depends on your fixture type, tank layout, and bulb technology. Swapping out a fluorescent tube in a rimmed hood is a different animal from replacing a sealed LED module or compact fluorescent in a low-profile fixture. Overlooking these differences can lead to wasted money, cracked bulbs, or even a dunked fixture. Let’s break down what actually matters for changing aquarium light bulbs—so you can upgrade safely, keep your plants thriving, and avoid the headaches that trip up so many home aquarists.
Why aquarium bulb changes aren’t as simple as they seem
It’s tempting to treat aquarium light bulbs like any other household bulb. But aquarium fixtures come with their own quirks: splash guards, narrow hoods, moisture-sensitive electronics, and unique mounting hardware. Planted tanks especially depend on consistent light quality and intensity, so timing and technique matter. Over the years, I’ve seen beginners crack fragile tubes, force incompatible bulbs, or even electrocute themselves by skipping crucial safety steps. Understanding your fixture makes a world of difference.
Comparing common aquarium lighting setups for bulb replacement
| Configuration | Typical Bulb Type | Ease of Access | Replacement Frequency | Water Resistance |
|---|---|---|---|---|
| Standard Fluorescent Hood | T8/T5 tube (18–36 in) | Moderate (remove cover) | 12–18 months | Basic splash shield |
| Compact Fluorescent Fixture | PC/CF bulb (9–55W) | Challenging (tight fit) | 8–12 months | Moderate (sealed end caps) |
| Replaceable LED Strip | Modular LED board | Easy (tool-free access) | 3–5 years | High (IP67 or better) |
| Integrated LED Panel | Non-replaceable LEDs | Not user-serviceable | Fixture replacement | High (sealed unit) |
| Clip-on Screw-in Socket | E27/E26 LED or CFL | Very easy (unscrew bulb) | 1–2 years | Low (exposed socket) |
Step-by-step: how to change an aquarium light bulb safely
- Unplug the fixture from power. Never work on any aquarium lighting while it’s plugged in—even if you’re just swapping a bulb. Moisture and electricity are a bad mix.
- Allow the bulb and fixture to cool. Many bulbs, especially compact fluorescents and LEDs, get hot to the touch. Wait at least 10 minutes after turning off the light.
- Remove the hood or access panel. For most standard hoods, this means lifting the cover or unscrewing a plastic shield. For low-profile LED fixtures, check for clips or latches.
- Gently extract the old bulb. For tube fluorescents, rotate the bulb 90 degrees and slide it out of the sockets. For screw-in types, turn counterclockwise. Don’t force it—if you meet resistance, check for hidden clips or corrosion.
- Inspect sockets and seals. Look for moisture, rust, or salt creep in the fixture. Wipe any contacts with a dry cloth. Replace cracked splash guards or rubber gaskets if found.
- Install the new bulb. Match the wattage, length, and pin configuration exactly. For T5/T8 tubes, align the pins and rotate into place. For LEDs or compact fluorescents, make sure the bulb seats fully and any waterproofing seals are intact.
- Reassemble the fixture and test. Replace all covers and shields before plugging back in. Turn on the light and check for flicker, uneven brightness, or buzzing—these are signs of a loose bulb or failing ballast.
What’s different about LED, fluorescent, and screw-in bulbs?
Fluorescent tubes (T8 and T5) are still common in classic hoods. These bulbs must match the exact length (commonly 18″, 24″, or 36″) and diameter (T5 is 5/8″, T8 is 1″). T5s are brighter and more efficient, but their pins are thinner and more fragile. Compact fluorescents (PC or CF) are U-shaped or spiral, often with a 2- or 4-pin base. These can be tricky to seat properly in tight hoods—forcing them can break the pins.
LEDs fall into two camps: modular strips with replaceable boards, and integrated panels where the LEDs are soldered in. Most home aquarists with modular fixtures can replace the LED board in under 10 minutes, but you’ll need to match the voltage (often 12V or 24V DC) and waterproof rating (look for IP67 or higher for splash resistance).
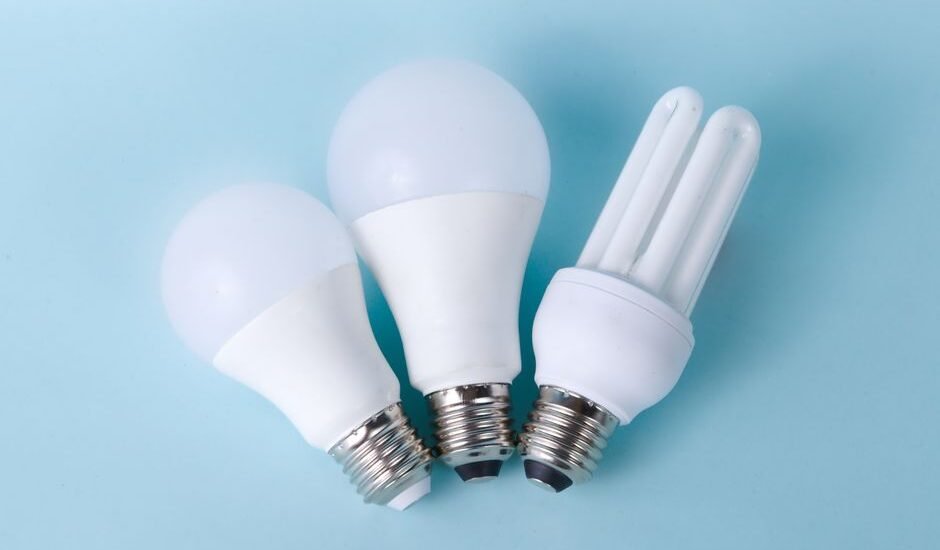
Screw-in bulbs (E27/E26) are the easiest: just unscrew and replace, as long as you pick a bulb rated for damp locations and avoid exceeding the fixture’s wattage rating (usually 15–30W for LED, 9–23W for CFL).
Beginner’s pre-purchase checklist
- Measure the inside length of your aquarium hood or fixture in inches—bulb length must match exactly for T5/T8 tubes.
- Check your fixture’s socket type: T5, T8, PC/CF pin count, or E26/E27 screw base.
- Verify the maximum wattage your fixture supports (printed on the label or manual).
- Confirm the bulb’s waterproof rating if it will be exposed to condensation (IP65 minimum for LEDs near water).
- Inspect for corrosion or salt creep on existing sockets—replace damaged hardware before installing a new bulb.
- Note the color temperature (Kelvin rating) of your current bulb if you want to match plant growth and appearance (most planted tanks do best in the 5000–7000K range).
- Read your fixture’s manual for any specific bulb recommendations or restrictions—some sealed LED fixtures are not user-serviceable.
Related Guides
- How to Change an Aquarium Light Bulb: A Step-by-Step Guide
- Our guide to Aquarium Light Timers That Make Tank Lighting Easy and Reliable
- Our guide to How to Adjust Aquarium Light Intensity: A Practical Guide
- Light Spectrum for Plant Growth: What Aquarium Plants Really Need
- Aquarium Air Stones That Actually Work: Our Top Picks for Healthy Tanks
- Our guide to Aquarium Canister Filters That Actually Work: Top Picks for 2026
How often should you change your aquarium bulb?
Fluorescent tubes generally need replacing every 12–18 months, even if they still light up—output drops as the phosphor coating ages, affecting plant growth. Compact fluorescents fade faster, often in 8–12 months. Screw-in LEDs typically last 2–5 years, but check for visible dimming. Integrated LED panels often require replacing the entire fixture after 3–5 years, since the diodes are not user-replaceable.
For optimal plant health, set a reminder to change bulbs on schedule. Don’t wait for a complete failure—plants will show signs of poor lighting (leggy growth, fading color) long before the bulb goes dark.
What can go wrong—and how to avoid common mistakes
Forcing the wrong bulb type is the quickest way to break sockets or crack glass. Always match pin configuration and length exactly. With compact fluorescents, double-check that you’re not swapping a 2-pin for a 4-pin base. For LED boards, mismatched voltage can fry the driver circuit or void your warranty. Never touch halogen or LED bulbs with bare hands—skin oils can cause hot spots and shorten life.
Moisture is the enemy. Any sign of water inside the fixture or on the bulb base means you need to dry and clean before installing a new bulb. Saltwater tanks are especially prone to corrosion; consider dielectric grease on contacts if you see repeated rust issues. Always plug the fixture into a GFCI outlet for added safety.
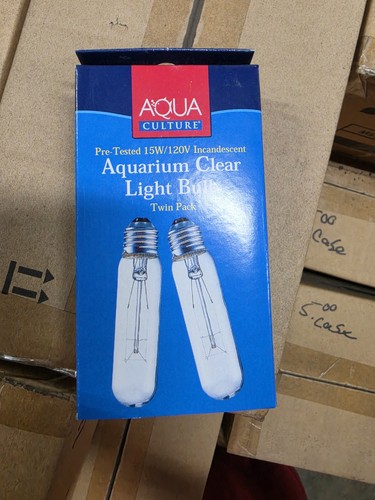
View what’s available for replacement bulbs and fixture upgrades.FAQ: Real-world questions about changing aquarium light bulbs
How long does a T5 aquarium bulb actually last?
Most T5 bulbs lose about 30% of their useful output after 12 months of daily use, even if they still light up. For planted tanks, replace every 12–18 months to maintain healthy growth and color.
Is it safe to use a regular household LED bulb in my aquarium fixture?
You can use a standard E26/E27 LED bulb if your fixture is rated for it and the bulb is labeled for damp locations. Avoid bulbs with exposed electronics near water, and never exceed the fixture’s wattage rating.
Which is better for planted tanks: T5 fluorescent or LED?
High-quality LEDs are more energy-efficient and last longer (3–5 years vs. 12–18 months for T5). LEDs also offer better color control and less heat. However, T5s can be more affordable for larger tanks and are still popular for certain aquascaping styles. Match your choice to your tank’s size and plant needs.
Can I upgrade from fluorescent to LED without changing my hood?
Some retrofit LED tubes are designed to fit standard T8 or T5 sockets, but always check the wiring requirements. Many require bypassing the old ballast, which should only be done by a qualified technician. In most cases, replacing the fixture is easier and safer.
What should I do if my new bulb flickers or won’t turn on?
First, check that the bulb is properly seated and the pins are straight. If using a fluorescent fixture, a failing ballast or starter is often to blame, especially with older units. For LEDs, check for loose connections or moisture in the socket. Replace damaged components as necessary.
Are aquarium bulbs covered by warranty?
Most aquarium bulbs have limited warranties, often ranging from 90 days to one year. Keep your receipt and check the manufacturer’s policy before purchase. Defective bulbs that fail early may be replaced if you contact customer support promptly.
How do I know what color temperature is best for my plants?
For freshwater planted tanks, bulbs in the 5000–7000K range provide a natural daylight spectrum that promotes healthy growth and vibrant colors. Lower Kelvin ratings look warmer but can encourage algae, while very high ratings (>8000K) can appear too blue and unnatural.
Additional resources for lighting safety and standards
For further reading on aquarium lighting standards and electrical safety, refer to the U.S. Consumer Product Safety Commission, which offers guidance on safe electrical products for home use. For plant-specific light requirements, the Aquatic Gardeners Association provides reputable information on lighting for aquascaping and planted tanks.

Last updated: July 2026 · How we put guides together