7 min read
Disclosure: As an Amazon Associate and eBay Partner Network publisher, we earn from qualifying purchases. This doesn’t affect what we recommend or how we describe it.
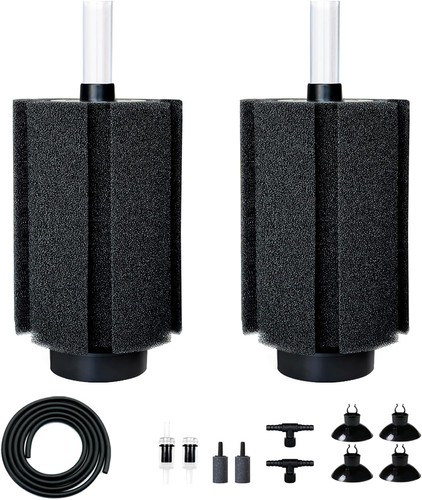
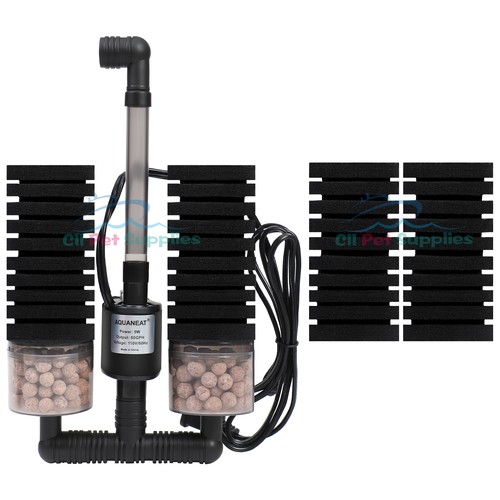
To deep clean a sponge filter, rinse the sponge thoroughly in dechlorinated water, squeeze out debris until the water runs mostly clear, and clean the intake tube and uplift if needed. This guide explains when and how to deep clean your sponge filter for optimal biological filtration, how to avoid harming beneficial bacteria, and what gear or methods work best for real-world planted tanks.
Why a Deep Clean Is Sometimes Necessary
For most planted tank setups, sponge filters are the backbone of gentle, reliable filtration. Over time, however, even a well-maintained sponge will clog with detritus, plant matter, and biofilm. This reduces flow rate, limits oxygenation, and can lead to cloudy water or sluggish plant growth. While routine squeezes in tank water are usually enough, a true “deep clean” is needed when:
- Flow is visibly reduced even after regular rinsing
- You see mulm (fine debris) puff out every time a fish swims by
- Algae or snail waste coats the sponge in thick layers
- The uplift tube or air stone is partially blocked
For most home aquarists, this means a deep clean every 2–4 months, though high-biomass or heavily stocked tanks may need it more often.
Main Deep Cleaning Methods and Tools: Comparison Table
| Method | Cleaning Tool | Time Required | Effect on Bacteria |
|---|---|---|---|
| Manual Squeeze | Hands only | 5–10 min | Minimal loss |
| Bucket Agitation | Large bucket (8–12 L) | 10–15 min | Some loss |
| Jet Rinse | Squeeze bottle or turkey baster | 8–12 min | Moderate loss |
| Tube & Uplift Scrub | Flexible brush (30–40 cm) | 5–7 min | None (if sponge not touched) |
| Full Disassembly | Hands + all above tools | 15–25 min | High loss if not careful |
How to Deep Clean a Sponge Filter: Step-by-Step
- Prepare a bucket of dechlorinated water. Use water from your tank or treat tap water with a conditioner. A 10-liter bucket is ideal for most home setups.
- Turn off air pump and remove the sponge filter. Disconnect the airline gently to avoid breaking the nipple or dislodging any tubing.
- Detach the sponge from the uplift tube. Twist or slide it off carefully. Place all parts in your bucket.
- Squeeze and agitate the sponge. Compress the sponge repeatedly underwater, letting debris escape. Swirl the sponge in the bucket for at least 1–2 minutes. Repeat until water is very cloudy and debris output drops.
- Rinse tubes and air stone (if present). Use a flexible brush or pipe cleaner to scrub inside the uplift tube. If your model has an internal air stone, gently brush it or soak it separately.
- Check for stubborn debris. For thick algae or snail buildup, use a soft-bristle brush or gentle jet from a squeeze bottle to dislodge gunk. Never use soap or chemical cleaners.
- Reassemble and reinstall the filter. Slide the sponge back onto the tube, reconnect airline, and place the filter back in your tank. Turn on the air pump and confirm strong, even bubbles.
For larger tanks or multi-sponge setups, clean only one sponge at a time to preserve beneficial bacteria. Compare options for replacement sponges or brushes if yours are wearing out.
Manual Squeeze vs. Jet Rinse: Which Is Better for Planted Tanks?
For most home aquascapes under 150 liters, the manual squeeze method is safest for your bacterial colony. It removes debris without stripping the beneficial biofilm that keeps ammonia and nitrite in check. Jet rinsing with a squeeze bottle can be useful for very fine-pored sponges (30–45 PPI), but risks blasting away too much bacteria if you overdo it. Reserve aggressive jet or full disassembly for rare, severe clogs—never as routine maintenance.
Larger or heavily stocked tanks may benefit from double-sponge setups. Clean one sponge deeply, then wait two weeks before cleaning the other, so your filter’s biological capacity rebounds. See today’s deals on multi-pack sponge filter kits suited for planted tanks.
Specifications that actually matter
Pore Size (PPI)
Pores per inch (PPI) determines what your sponge traps. Most planted tanks do best with 20–40 PPI: lower (10–20) catches coarse debris, higher (40–60) is gentler on fry and shrimp but clogs faster. Pick based on your stock—shrimp tanks benefit from finer sponges, while goldfish or cichlid tanks need coarser grades.
Sponge Diameter
The diameter of the sponge (usually 6–12 cm for home setups) directly affects surface area for bacteria and debris capture. Too small, and you’ll clean constantly; too large, and flow may be sluggish. Match diameter to your tank size: 7–8 cm for nano tanks, 10–12 cm for 100+ liter aquariums.
Uplift Tube Length
Uplift tubes come in fixed or adjustable lengths, typically 10–30 cm. Taller tubes boost water circulation and oxygenation, especially in tanks over 40 cm deep. Ensure the tube reaches at least halfway up your tank for even flow.
Air Stone Compatibility
Some sponge filters include a chamber for an internal air stone (typically 2–4 cm long). Air stones can improve bubble fineness, but clog over time, requiring separate cleaning. Check your filter’s specs before buying replacements.
Replacement Cycle
Sponges last 6–18 months depending on stocking and cleaning frequency. Discoloration, persistent odor, or crumbling texture means it’s time to swap. Always replace only one sponge at a time in multi-filter setups to avoid mini-cycles.
When to Replace vs. Deep Clean
Even the best sponge can’t last forever. If your filter’s flow doesn’t recover after a deep clean, or if the sponge has become brittle, cracked, or won’t hold its shape, it’s time for a new one. For tanks with heavy bioload or lots of plant debris, expect to replace sponges every 8–12 months. For lightly stocked aquascapes, 18 months is realistic. View what’s available for replacement sponges in various sizes and pore grades.
Always keep a spare sponge on hand. Swap in the new one and let it run alongside the old for 2–3 weeks to seed it with bacteria before fully retiring the original.
Related Guides
- How to Deep Clean a Sponge Filter: Step-by-Step Guide
- Our guide to How to Set Up a Double Sponge Filter: Step-by-Step Guide
- Best Pre-Filter Sponges: What to Look For and What to Avoid
- Our guide to Sponge Filters That Actually Work: Honest Reviews and Recommendations
- Canister Filter vs Sump Filter: Which Is Better for Your Aquarium?
- Hang-On-Back Filter vs Canister Filter: Which Is Right for Your Aquarium?
FAQ: Sponge Filter Deep Cleaning for Planted Aquariums
How often should I deep clean my sponge filter?
Deep cleaning is usually needed every 2–4 months, but this depends on tank size, fish load, and plant debris. Heavily stocked or messy tanks may require monthly deep cleaning, while low-stocked, well-maintained setups can go longer between sessions.
Can I use tap water to clean the sponge?
Tap water can harm beneficial bacteria due to chlorine or chloramine content. Always use dechlorinated or tank water to clean your sponge filter, especially during deep cleaning. This preserves your biological filtration and prevents mini-cycles.
Manual squeeze vs. jet rinse — which removes more debris?
Jet rinsing with a squeeze bottle or turkey baster can remove more fine debris, but it also risks stripping away too much beneficial bacteria. Manual squeezing is safer for routine deep cleaning and preserves more of your filter’s biofilm, making it the preferred method for most aquascapes.
How do I know if my sponge is worn out?
Signs of a worn sponge include crumbling, persistent foul odor, loss of elasticity, or inability to return to shape after squeezing. If these appear, it’s safer to replace the sponge rather than attempt further cleaning.
Will deep cleaning crash my cycle?
If you clean with dechlorinated water and avoid harsh scrubbing, most of your beneficial bacteria will survive. To lower risk, never deep clean all filtration at once, and consider cleaning only one part of a multi-sponge setup at a time.
Are all sponge filters compatible with air stones?
No, not every model is designed for internal air stones. Check for a dedicated chamber or fitting in your filter before adding one. Using an incompatible air stone can block airflow or reduce filtration efficiency.
Is there a warranty or return policy for generic sponge filters?
Most generic sponge filters do not come with a formal warranty, but return policies vary by retailer. Inspect new sponges for defects before use, and check compatibility with your uplift tube and air pump. Always keep receipts or order confirmations in case of manufacturing faults.
Additional Resources for Further Reading
For more on filtration best practices and water quality, see the British Aquarist Society and the Fishkeeping World knowledge base. Both offer practical, peer-reviewed advice for planted aquarium hobbyists.


Last updated: June 2026 · About our research